Overview
Administrators have the ability to make modifications to users and virtual users (Hunt Groups, Auto Attendants, Call Centers). Some examples of possible modifications include:
- Adjusting the name on a user
- Adjusting the email address on a user
- Assigning phone numbers and extensions
- Assigning physical phone devices
- Enabling or disabling the use of Webex for a Premium user
Updating User Details
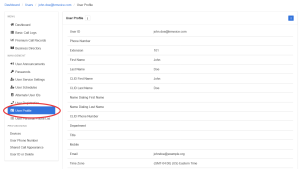
- Select the user you want to modify.
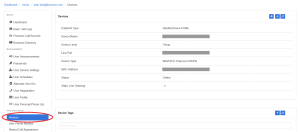
- Click User Profile on the left column navigation.
- Click the hamburger menu and click Edit User.
- Edit the fields that require modification. Important fields include:
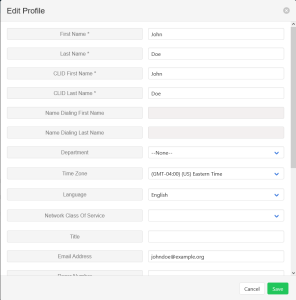
- First Name
- Last Name
- CLID First Name. This field changes how the user’s first name appears when calling another user.
- CLID Last Name. This field changes how the user’s last name appears when calling another user.
- Department
- Time Zone
- Email Address. The email address in this field is used for:
- Signing into the HPBX Portal at https://hpbx.kmvoice.com
- Signing into Webex
- Receiving transcribed voicemails
- Click Save to apply changes.
If the user seat has been re-assigned to a different person and they use a physical phone, be sure to follow the testing emergency dialing steps on their phone to ensure the emergency address is correct.
Updating Email Address for Webex-enabled Users
If a user has Webex enabled, then the user’s email address must be updated within the Webex Control Hub first before it can be updated within the HPBX Portal.
If the email address is not updated within Webex Control Hub, attempting to update it within the HPBX Portal will result in an error.
Note: Modifying users within the Webex Control Hub requires an additional feature to be enabled on your Webex organization. Contact your account team to enable this feature if needed.
Updating Primary Phone Number and Extension
- Select the user you want to modify.
- If adjusting the user’s phone number:
- Click User Phone Number on the left column navigation.
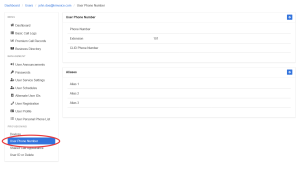
- Click the gear icon to bring up the edit dialog.
- Clicking on the Phone Number field will bring up a selection box containing all available phone numbers.
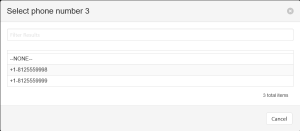
- Select the number to assign to the user. Note: when a number is selected, it will automatically adjust the Extension field based on the phone number selected. If Extension is already set and only Phone Number is being changed, make note of the Extension before selecting a new Phone Number.
- Click User Phone Number on the left column navigation.
- If adjusting the user’s extension, edit the value in the Extension field.
- Click Save to apply changes.
CLID Phone Number
The CLID Phone Number field on a user may be set to override the phone number that gets presented when the user dials outside your group. If the user utilizes this field and it requires adjustment, you must contact the UC Service Desk to request this change.
Updating Alternate Numbers
Premium Seats, Hunt Groups, Auto Attendants, and Call Centers can have more than one phone number and extension assigned to them. See Alternate Numbers.
Updating User Device
- Select the user you want to modify.
- Click Devices on the left column navigation.
- Click the gear icon in the top right to bring up the device selection dialog.
- If the user should not have a device assigned to then, change Endpoint Type to “None”, else select “Identity/Device Profile”
- If assigning a device to this user:
- Click the icon next to the Device field to bring up the list of available devices.
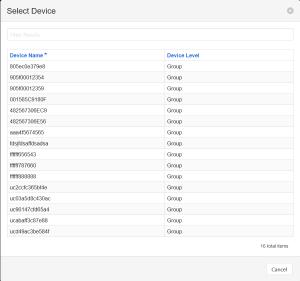
- The devices in the list are listed by name which for desk, conference and DECT phones should be the MAC address of the device. If a device does not appear in the list, then it may be already be in use or hasn’t been added. A list of all devices can be viewed from the Devices area under the group. If the device does not exist, then contact the UC Service Desk to get it added to your group.
- The Line Port field should already be set if the user previously had a device. If it is set, do not change it.. If it is empty, set this to something unique. We recommend using a random string of numbers and characters. It must be a unique value.
- Click the icon next to the Device field to bring up the list of available devices.
- Click Save to apply changes.
After assigning a new device to a user, follow the test emergency dialing steps to ensure emergency dialing is working and the address is correct.
Enabling Webex for a Premium User
Users with a Premium Seat license have access to Webex. To enable Webex for a user:
- Select the user.
- Set the Email Address on the user per the Updating User Details instructions.
- Click User Service Settings on the left-hand navigation.
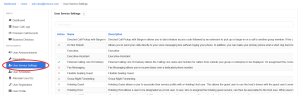
- Select Integrated IMP from the services list.
- Click the gear icon.

- Check the Enabled Integrated IMP checkbox and click Save.
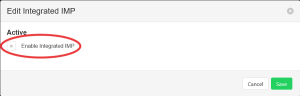
- An email will be sent to the user’s email address with instructions on setting up a password for Webex.
If you receive an error after clicking Save, something went wrong creating the user in Webex. Either a valid email address is missing on the user profile, or a Webex user may already exist for that email address.